Food: Restaurants, Recipes and More!

All paint products and paint colors needed are listed below. I have linked all needed tools/paint products in my LikeToKnowIt so you can easily add the supplies to your Lowe’s cart: http://liketk.it/2Ty31

I have to start off by saying how AMAZING Bert did on the nursery wall. I was impressed, but when people keep asking where we got the wallpaper, you know you did GOOD.

So, I wanted to let everyone know the process it took since others wanted to do the same.

Paint colors we chose (all in satin):

TIP* Any unused (I assume unopened) paint from Menards is returnable for refund! Better to have it all made at once and have extra so the tint/color mix throughout your project is consistent.

Nautica branded colors:

Close mountains (darkest blue) 2 qt. : Nautica Deep Atlantic NT467

Middle Mountains 1 qt. : Nautica True Quarry NT486

Evergreen Trees 1 qt. (not pictured) : Nautica Beach Pine NT444

Snow Caps (sample size) : Nautica Seafoam White NT633

Dutch Boy branded colors:

Main walls & Background 3 Gal. : 439-2DB

Back Layer mountains 1 Qt. : 435-4DB or 435-2DB (confirm preference before purchase)

If we had a girl, Bert had shades of pinks picked out for mountains. He was dedicated to the mountain theme, and I loved it too.

Step 1: Paint the background color.

Tip: Before you ever use a can of paint, shake well and stir with a paint stick. This will assure your paint color is consistent throughout.

For us, this color was also what we painted the rest of the room walls. You don’t have to paint the entire accent wall because you’re going to be painting mountains on them. I’d say we covered the top ¾ of the wall. We let it dry over night for each layer we did. I’m sure that’s not necessary, but this way there was no risk in pulling paint off with the tape.

Look at that proud Daddy to be! 🙂

Step 2: Mark where all peaks will be.

I think the hardest part was choosing where the peaks were going to be. We didn’t want it to look like all the triangles/mountains were perfect.

Bert put little pieces of tape where he thought ALL of the peaks to go to picture how it would look before he started to tape them. So little pieces, like 1 in. to mark the peaks of all 3 layers. Then as we painted layers, we moved the next layer’s peaks around before we painted.

Step 3: Tape off where you want the front layer of mountains.

This will be for the front color that goes all the way to the floor.

After he had the peaks marked, he taped all of the edges of the front layer mountains and connected to the peaks all the way from one side of the wall to the other while leaving them to cross each other on the bottom forming valleys. Also recommend taping the neighboring wall edges. Put the tape on the opposite wall so the mountain color doesn’t get on the solid wall color. This made the edge lines perfect.

Step 4: Razor off excess tape to form triangle for valleys.

BE CAREFUL not to press too hard, because you will cut into the paint beneath it. Not a big deal, you’ll be the only one to notice it… and your spouse J. Your spouse will notice. You do not have to razor off the ends of the tape for the tops of the peaks. Only the valleys because you will have to re-tape for the second/middle layer of mountains or else you will obviously have a stripe in the middle (which is also another cool way to do the wall that is much easier).

Step 5: Paint front layer of mountains.

This is again the layer that the color will go across the entire bottom of the wall. The white peaks are last. We just painted all of the layers of mountains before choosing which peaks were going to have white caps so we could visualize it.

We did 2-3 coats of each layer. It’s not that much paint and just thought it looked the best. Allowing 3-4 hours between each coat for it to dry. So this took some time overall, but sometimes the painting increments were only 15 minutes. We used a 2” angled brush to paint the edges of the mountains and would start with the brush on the tape and slide onto the mountain to avoid pushing paint underneath the tape if there was any room for it to bleed through.

Tip: Before painting, run your hand over the tape and press hard to the wall just in case the tape has lifted at all. We would even tape one day, and paint the next just because it was the most time consuming step… and the least fun haha.

Tip: Remember to wash your brushes out in between coats. We just left them to dry on the edge of the sink in the nearby bathroom. You can wash out your rollers too, but honestly, they come in a pack of 3-4 so we just used a couple extra.

(Once final coat is complete, I recommend leaving overnight before pulling tape.)

Step 6: Remove tape from front layer of mountains.

Do this slowly and try to create as much of an angle upward as possible to avoid the paint attached to the top of the tape pulling paint from the front layer mountain with it.

Step 7: Tape the middle/second layer mountains.

Unfortunately, this also means, re-taping the other side of the front layer mountains. So this will create the boundary between the front and middle layer mountains. Then tape the peaks of the second layer mountains as you did for the front layer. Again, we took small pieces of tape to mark where we thought the peaks should go. Leaving the excess at the top creating the perfect peak, no need to razor that part off because you will remove this tape before painting the final back layer mountain. Then carefully razor off the excess for the valleys.

Don’t forget to tape the corners again to prevent the middle layer mountain bleeding onto the neighboring wall.

This was a long step, so Bert did the taping in the morning and we painted the middle layer that evening.

Below, you can see him re-taping the first layer mountains in preparation for the middle layer painting. He waited until the re-taping was complete until he chose the final peak layout for the middle mountains.

Step 8: Paint middle/second layer of mountains.

We again first used a brush for all edges. Starting on top of the tape to avoid the bleeding beneath. Then we used a small roller for this just because it was much less space. 2 coats minimum. We tried with just a brush, but there was no hiding the brush strokes and just didn’t like the contrast texture.

Let dry overnight before removing tape.

Step 9: Remove tape from second layer mountains.

Again, do this slowly and creating an angle by pulling upwards seemed to work best for me.

Step 10: Tape the edges for the 3rd and FINAL layer of mountains.

We took a second and thought about which peaks we would want to have the white caps and moved a few of the final peaks around for this layer so the white caps would look best.

Repeat what you did for the middle layer mountains as far as taping. Tape off the bottom edges, the peaks, the valleys (razoring off the excess), and the edge for the neighboring wall.

Step 11: Paint final/back layer of mountains

We lined with a brush like we did the others (see below), and finished with a small roller.

Let dry overnight.

Step 12: Remove tape.

Although you could technically not remove the tape for the mountain you chose that will have a white cap, we just wanted to stand back and look at the finished wall before making the final decision which peaks would have the white caps.

Step 13: Tape off the peaks you chose to have white caps.

Try not to make the bottom angles of the caps look all the same. Some of ours start upward/downward, etc. (see photos).

Step 14: Paint white caps.

Painting the first layer with a brush worked best for us because the roller seemed to bleed through the edges. We thought about leaving the brush stroke texture for the caps, but I just decided I wanted them all to have the same look.

Leave over night before pulling the tape.

Step 15: Touch ups.

You can re-tape any lines that need touched up. Probably things only you will notice anyways. Downside of it being your own masterpiece is that you know all the “flaws”.

BUT, you’re FINISHED!

We were going to paint small evergreen trees also, but I bought too much furniture, haha, so you wouldn’t see them anyways. Maybe next time I guess!

I hope you enjoy your new mural as much as we do J.

xo Katie

Fair warning, if the title of this post is not appealing to you… don’t expect the content to be any different.

I haven’t told many people about my experience during my first trimester, but now that we are approaching the 30-week mark, I’m feeling much more confident about baby boy’s soon arrival! Unfortunately, the first half of my pregnancy, was not filled with the same comfort.

Also, just to be clear. Baby boy is perfectly safe and has grown throughout a healthy pregnancy once the hemorrhage occurred and healed.

6 weeks, 3 days. No heartbeat yet (which is normal)

Once Bert and I returned from Japan, we did not keep the pregnancy a secret. I just HAD to tell our close friends and family. We are pretty close, so they would figure it out on their own anyhow. As soon as I would have told my sister in law that I wasn’t running in our next marathon with her, haha, she’d have known for sure.

I don’t regret sharing early because those who we told would be those who were there for us god forbid if anything went wrong. Besides, nothing is a “secret” in this small town of ours anyhow.

I went to the doctor for the first time at 5 weeks.. after all I had known I was pregnant just 7 or 8 days after conception (hard to determine since we conceived in the US and found out on the other side of the world!). We were heading to Florida to visit Bert’s parents and wanted to make sure for when we shared the exciting news. We couldn’t see anything in the sac yet, but pregnancy was confirmed!

5 weeks, 2 days (No baby yet, but again.. normal) He was on his way!

Once we returned from Florida, we went back to the doctor for my 6 week appointment to confirm the pregnancy was not ectopic, where the fetus develops outside the uterus, usually in a fallopian tube. But, all was good! No heartbeat yet, which is normal, but “it” (at the time) was in there. Huge milestone of relief for any parent-to-be!

8 weeks, 3 days – Heartbeat confirmed… subchorionic hematoma also confirmed.

It was my 8 week + 3 day appointment. I went to confirm the heartbeat. Bert was not allowed because… Covid. At this appointment, our doctor informed me that I had a subchorionic hemmorrhage (aka hematoma/bleed) on the lining of my uterus. Having to leave the office and explain this to the other parent of this little boy or girl, took some accepting. I didn’t want to scare him, but I also had to understand and portray the severity of what we were possibly about to encounter. Miscarrying at this point, was definitely a possibility. It brings tears to my eyes just typing about how I felt in that moment and knew that fear wasn’t going anywhere any time soon. The “good” thing is that apparently 30% of pregnancies have these and the mother doesn’t even know! Like, what?! 30%… how have I not heard of this? When a woman experiences light to heavy early bleeding, it can often be this hematoma just running its course and “dissolving” on its own. My OB said this happened to her in the middle of lunch at Panera! Good lord. Can you imagine? For me, I was just standing at my microwave, and thank GOD I already knew it was a possibility.

Anyways, many of you wondered and some asked me why I had stopped running. As I was running 5 miles a day with no problem early on. NO… the running did not cause this… eye roll for those of you who are thinking this… the hematoma started to pool from the very beginning. Where the issue falls is if it does not self-dissolve and continues to grow with the baby. Some can grow to be just as large as the uterus… or more commonly the issue is rooted from it rupturing and is not allowed to heal and keeps filling and rupturing and so on. It’s a hematoma, so the way I understood it is a bruise that pools blood. Like one of those purple bruises just under your skin. If you keep punching yourself in a bruise, it’s probably not going to heal very well. So I was on bed rest for a few weeks. TMI, but no sex, no exercise, literally bed rest to its fullest definition. Which falls about the middle of March… aka quarantine… so I was completely thrown off my rocker when it came to maintaining any sort of muscle I had built up that would help me maintain good practice for the next 7 months. I had just returned from a 7 day extensive back country snowboard trip in Japan just days after running a marathon. I was READY to be the “fit” mom. Which you may see as selfish for it to be a major disappointment, but for someone who has not gone more than a couple of weeks without distance running in years and uses exercise as an outlet to tackle mental blocks as many of you do, it was pretty challenging. And not to mention the worry of the baby. Day in and day out. I’m thinking about how people are probably judging me for being so “lazy” literally posting from my chair every day for weeks on end, and not exercising. I couldn’t even sit at home and drink my wine like many of those who were suffering from the quarantine blues were doing, haha!

I wanted to write this because NOT ONE of my mom friends, not even the nurses, nurse practitioners, etc. had heard of this, when it’s oddly so common. If one person reads this that ends up in a doctor’s office in their first trimester one day hearing they have a “hemorrhage”, maybe it won’t be as scary as it was for me. Just go home and enjoy that Netflix and hope for the best!

After all, most of these do dissolve on their own and result in a healthy pregnancy with a healthy baby, but we all of course naturally jump to the thought that we will be one of those where it does not.

xo Katie

What working from home truly looks like when there aren’t any zoom calls that day. Dogs, coffee, and no make up.


I will be the first to say that working from home can be MUCH less glamorous than most may think. I have worked remotely for the past 5+ years, and just until recently, most people assume that a WFH lifestyle is SO amazing. And mind you, it most definitely has its perks. Since quarantine started for most of us, more and more people are not only getting to enjoy the flexabilities that come with this change, but also the struggles. Some of us work better with less structure and some of us tend to spiral into unorganized, anxious, stressful, unhealthy habits that bleed into all aspects of life. Whether that be spending time you should be working doing other things like cleaning that house you get to stare at all day, exercising, visiting with family, etc, if you’re like me, they can be very distracting! But IT IS OKAY. You CAN take these breaks to do these things, it’s, as they all say, all about balance. Here’s how I have managed to make this lifestyle into a successful career, and also enjoy the benefits that come with the flexibility.


**MORNING ROUTINE– I cannot stress this enough. In the very beginning, I was still living at my dad’s, I was only 23, and sleeping until 9am was a norm. Obviously, this was not going to cut it. Having a morning routine… that can and will vary within reason… is something that can make or break you. Get up. Wash your face, brush your teeth, answer those lingering emails before you’re supposed to start working that way when you are enjoying your coffee, you’ve already begun your work day. The littlest things seem to help me have a positive mindset. Making my bed, putting on a spontaneous video call appropriate top, they just make me feel most prepared. And it does not happen EVERY day, but my goal is “most” days.

**Forgive yourself – you are going to have days where you do not work as much as you’d have liked. You don’t need to apologize to anyone, your superiors have those days too. Just put the bad day behind you and don’t let it ruin tomorrow. For me,  that’s where the spiraling seems to happen.

**Plan – This is something I continue to struggle with! Some years I am great with this, other years, I am not. I have found, as most people who keep a planner with tell you, that they could not survive without it. Scheduling out your time the day before is very helpful. This should include your time that is not related to work, or else you could again.. spiral… but INTO your work rather than out of it. For me, that has never been an issue haha. I WISH I had the problem of work obsession, although I know those are not easy shoes to be in either.

**Take a break and GO OUTSIDE – Give your brain a break. I sit in the same room 5 days a week and stare at things in my home and my brain just starts to fog and the anxiety sets in STRONG. It is amazing what a 30 minute walk (since I’m currently 6 months pregnant) or run or even just a drive to the gas station for a small treat does for me.

And finally…

**Perception is everything – I lead into this above when I discussed forgiving yourself for the distracted days, but perception really is everything. I think the biggest mistake I see my peers make is being their own worst enemy. Scheduling a meeting with a superior to discuss your need for help in regards to motivation or struggle. In reality, upper management does not want to hear about how you are making change to stay more motivated, they just want you to be able to handle the ups and downs without engaging them and be able to FIND the motivation that is needed to get your work done.

Just do your best, and don’t let yesterday ruin tomorrow!

xo Katie

If you did not know, I have run.. (ran.. whatever, this isn’t English class) 20+ marathons and a full 140.6 Ironman in the span of 3.5 years. Prior to this, I had never run a 5k. I played competitive soccer in High School, but as many of us, my fitness really went out the window in college. I could NOT believe those people that managed to get up to WATCH their friends run a marathon, let alone run one.

In July 2016, my friend told me she wanted to run a marathon and I was SHOCKED. I probably even made a few comments as to why she was crazy, but deep down it was rooted from jealousy because who doesn’t want to at least be fit enough to run a marathon. So, a few months later, I joined her!

Tip/Step 1: (Well for me, that was to register for one. Because there was no way I was quitting)

I remember the first 3 miles I ran. Definitely with a few walking breaks. Texting my already marathoner sister-in-law saying that I really think I done F*d up registering for the Chicago marathon. Haha! (of course I registered before even having run a mile).

Tip/Step 2: RUN at least 1 mile without stopping.

If you can train yourself to run 1 mile slow enough that you can finish without stopping… I don’t know the statistics… but I’m pretty sure you can progress enough to finish a marathon. Sound crazy? Well, if you can run a mile… then you can run a mile 2x a week, then 3x, then every day, then 2 miles… get it? That’s just how it works!! Barring any injuries, the physical ability IS attainable. It’s the dedication and mental toughness that will stop you.

Tip/Step 3: Run a 5k

For me, I did not register for a 5k. Marathons are expensive, so I figured if I was going to pay for a race, a 5k was not worth it to me. As I mentioned earlier, I walked out my front door and ran 3.1 miles. I don’t think I owned a watch at this point. I remember driving 1.6 miles in my car from my house one day and knew that was how far I’d have to run there and back. Some people (like my brother) don’t even use a watch for training EVER. This is not a common practice, but it is possible. Remember 1.YOU are the machine. All you need to run are a good pair of shoes, and even them, marathon runners have existed long before shoes were as well designed as they are today. 2. RUNNING IS FREE. There is no monetary excuse not to be a runner, if you enjoy it.

Tip/Step 4: RUN SLOW!

I cannot stress this enough. If your goal is to RUN A MARATHON. I do not care if you can run a 5k in 17 minutes. Learning the ability to maintain a pace for 3.5-5.5 hours straight, is a bit different, OKAY! (Super legit if you can run a 5k that fast though lol, I definitely canNOT). Your goal in the beginning is to get used to running further and further in one sitting without stopping. This all sounds so common sense, but until you do it, for me it was just a mystery HOW to start.

Tip/Step 5: Choose a training program/schedule

I, and most of my running friends, swear by Hal Higdon’s training program. This is the one I used: Marathon Training Program. There are a few different training programs to choose from based off of your starting ability. There are also half marathon training programs, if you wanted to start there. There’s no one right way or time frame to become a marathoner. You DEFINITELY don’t have to do it within one year. It will be just as impressive and accomplishing crossing that finish line whether it takes you 5 years or 5 months.

Tip/Step 6: Register for a half marathon.

Seems a bit aggressive having only run a 5k? Well, I sincerely believe if you have taught yourself to run 3.5 miles without stopping, you are FULLY capable of running a half-marathon. Probably sounds crazy again. Well, barring injury, you’ve beaten the mental aspect of running enough to run 3.5 miles. That will be the same strength you build on as you continue to run a 4, 5, 6, 7 miles… It will just vary how quickly you’re able to progress. Your biggest road block will be your own mind/excuses, I promise you that… again.. as always.. barring injuries.  Choose a race far enough out that you feel comfortable with. For me, since I already registered for a marathon, HA, I had better choose a half marathon a few months before my full marathon.

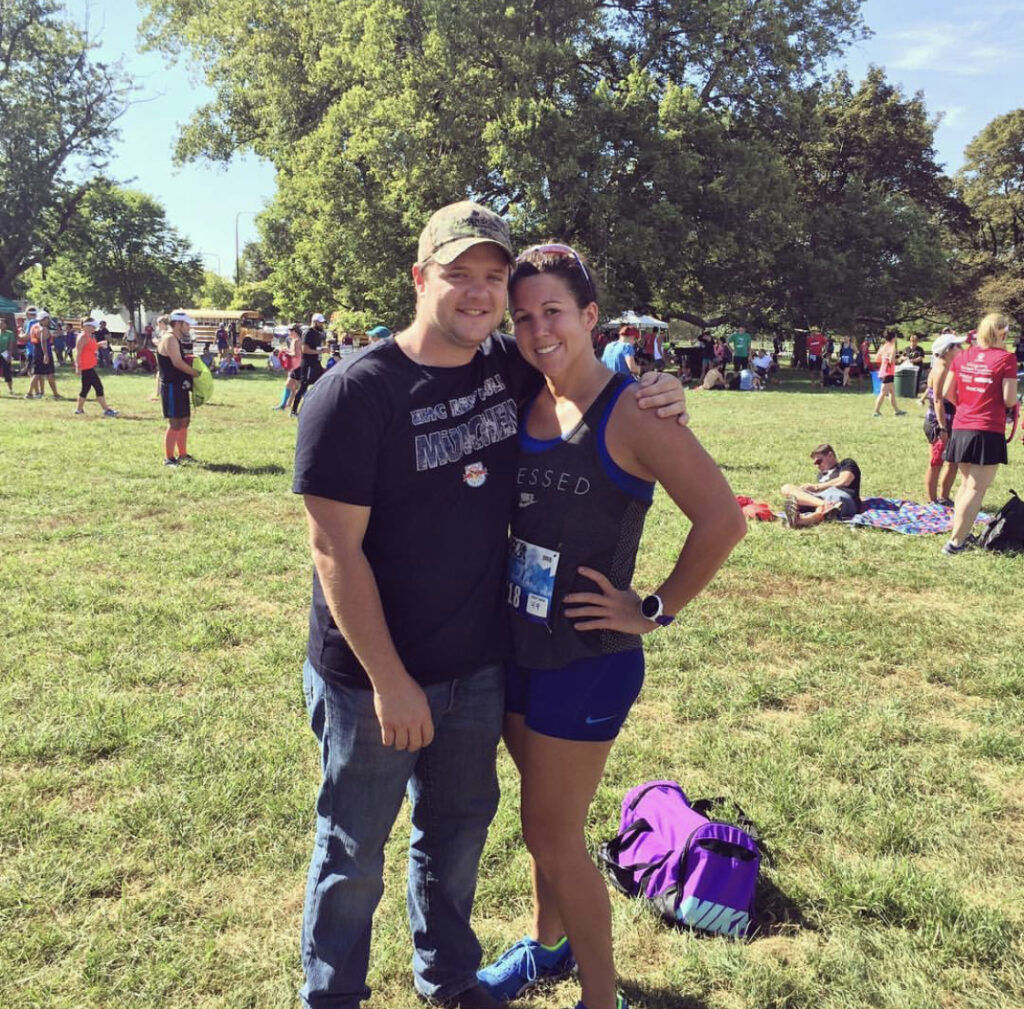
My SIL and I at my first half – Muddy Monk 1/2 Marathon

The Aid Stations ran out of water. I’ve never had this happen again. It was a FLUKE and petrified me for future races. It was the most humid race I’ve run to date. Not ideal! But, things come up.

Tip 7: Be consistent, but don’t be hard on yourself

Did I follow my training program to the T? No. Did I have friends who said “I was really strict. I made sure I ran every single day the program said to”, yes. Did we both finish the race, YUPP! You don’t get a medal for HOW you train. You get a medal for crossing that finish line. That being said, the most important thing when choosing how hard to train is listening to your body. If you’re training on a tweaked knee, you’re probably hurting yourself more in the long run… ha.. pun… than you would be by taking a week off.

Tip 8: Don’t skip the long runs

Although I wasn’t the strictest of training runners, I did not skip my long runs. AKA: the longest run of the week that usually is longer than the week before in your training program. Whether I ran 4 days that week, or got in just a few miles, I made sure I completed my long run on the weekend. After all, I knew deep down that if my mind had not made it past that mile # in the past, I would never make it to 26.2. Increasing my miles was the only way there.

This was after my first 20 miler. (Chicago Lakefront 20 Miler) It went great! Except for when Bert went to the start line in stead of the finish line by accident and missed my finish. HA! It was a point-to-point race, and a warm sunny run at that. He also started to workout and get fit not long after this. CHECK BACK for a post about how this newfound lifestyle/hobby of yours will bleed through to your love ones 🙂

Tip 9: Hydrate and eat.. as runners refer to as “nutrition”

Okay, I could probably run 6-10 miles without a sip of water. This is not an accomplishment. Your body NEEDS water long before it tells you you’re thirsty. You know this. 90% (I made that up.. but probably pretty close) of people don’t drink enough water in a day who do not run, let alone runners. Drink water every couple of miles to keep your muscles from cramping and to be frank… from going into kidney failure.. which does happen. As for eating, trial and error throughout training should prepare you for this just fine. Just eating SOMEthing whether it’s a caffeinated gummy/cliff bar/mnms etc. every 5 miles or so, and you should be good.

Tip 10: “Run YOUR race” – “Run when you can, walk when you have to” – “nothing new on race day”

The day is here. If you try to run faster OR slower to stay with a friend, odds are you’ll regret it. No matter what way you spin it.. 26.2 is a long a** time to be running. By the end, you’re likely going to want it to be over with. Starting off too quickly because you “can” and are feeling good, I promise you a couple of hours later you will be wishing you had run at the pace you’ve been practicing. Adrenaline will only get you so far. At this point, you’ve put in the time, if you’ve trained with nutrition and have completed at least 1 “20 miler”,… barring injury… and mental toughness… you WILL finish the marathon.

CHECK BACK for tips on what products I used while I trained. You will need a pair of shoes that work for you, but just remember, YOU are the machine.

xo Katie

So obviously I must start out by saying these are all opinions based on research and referrals, not experience since this babe will be our first! But, I have listened to numerous podcasts, read reviews, influencer feedback, statistics, etc. and we are very confident in the safety reasons for the below products. They are definitely not on the cheaper side, so I tried to find discounts and codes where I could.

1: SNOO: $1395.00 or $188 per month rental

www.HappiestBaby.com

Pretty much in our eyes, ANYTHING that is proven to keep the newborn asleep and therefore give US more sleep, we are a fan of. For the first 4-6 months, we plan to keep Baby M in our room with the Snoo near our bed.

Perks of the SNOO:

*Rocks and shushes baby all night while sleeping

*Secure swaddling and prevents rolling

*Sleep trains to self-sooth rather than cry it out

*Mobile app provides daily sleep report

*Training program online to help guide you and your baby out of SNOO

*95% of customers can find success with SNOO and their support team will help you reach this. I can say by experience has an amazing response team.

*Not to mention the design is super cute 

If the price of purchase is not attainable, or for example if you know this is your last child, SNOO offers a rental program for $188 per month. Since we plan to have more children, we justified the purchase route.

There are often discounts available at the SNOO website at HappiestBaby.com PLUS they offer an AMAZING Military discount of THIRTY percent off purchase or 10% off rental. That’s almost $400 off.  Note: they do not allow discount stacking.

CON: Price and term of use is only for first 4-6 months

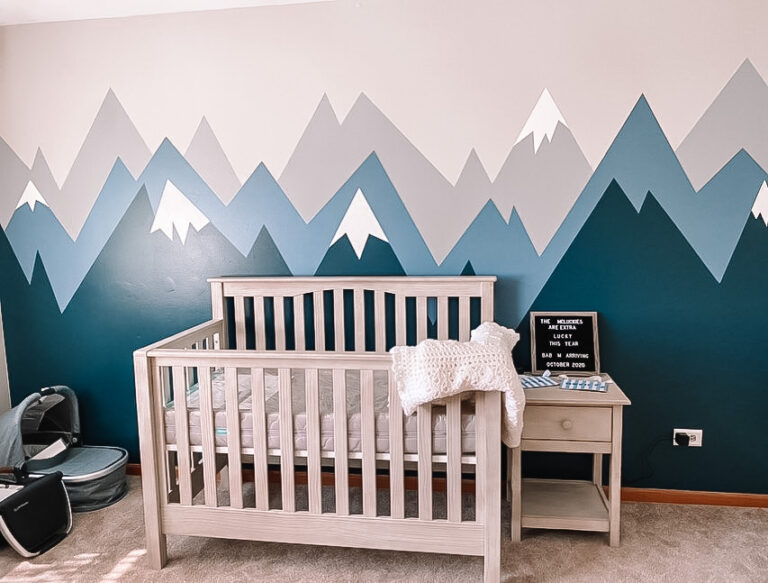
2: NewtonBaby Mattress: $249 – $299 ($50 off code : McLuckie50)

www.NewtonBaby.com

The Newton Baby Mattress is the ONLY 100% Breathable and Washable crib mattress. You can literally breathe right through it. For me this alone sealed the deal since our nursery is not directly next to our bedroom, and just eases my nerves a bit. We did not choose the waterproof version because we figured it’s machine washable, but we will see if that was the right choice)

Perks of the Mattress:

*100% Breathable, Washable, & Recyclable – not only the mattress cover is washable, but the mattress itself can be washed in the bath tub

*No sheet set necessary (other than the breathable NewtonBaby cover) – actually recommended not to use a sheet set at least in the early stages. (recommended to purchase an extra or two covers in case of accidents)

*cooling and allows your baby to sleep without sweating

*Longevity for infant and toddler stage

*100 night in home trial (that begins on your due date if you order in advance)


Newton Baby

$50 off code : McLuckie50

3: Owlet: $299.00

Truthfully, I chose the Owlet because my friend had an experience where the Owlet HR monitor woke her up because her baby’s HR dropped, and she was actually choking on spit up. Scary thought, and again since the nursery isn’t directly next to our room, I’ll sleep better at night knowing that we have the extra awareness!

CON: price and availability (ours was on back order with pottery barn for 3 months)

When it came to the car seat/stroller (we chose Uppa Baby Vista V2), the Mamaroo, and the baby monitor (we chose Nanit because the video goes to your phone), there really were a few that I felt would work equally as well and had the same functions. The mamaroo was enticing, but since we have dogs, I wanted something that sat a little higher off the floor, or else I probably would have gone with that also.

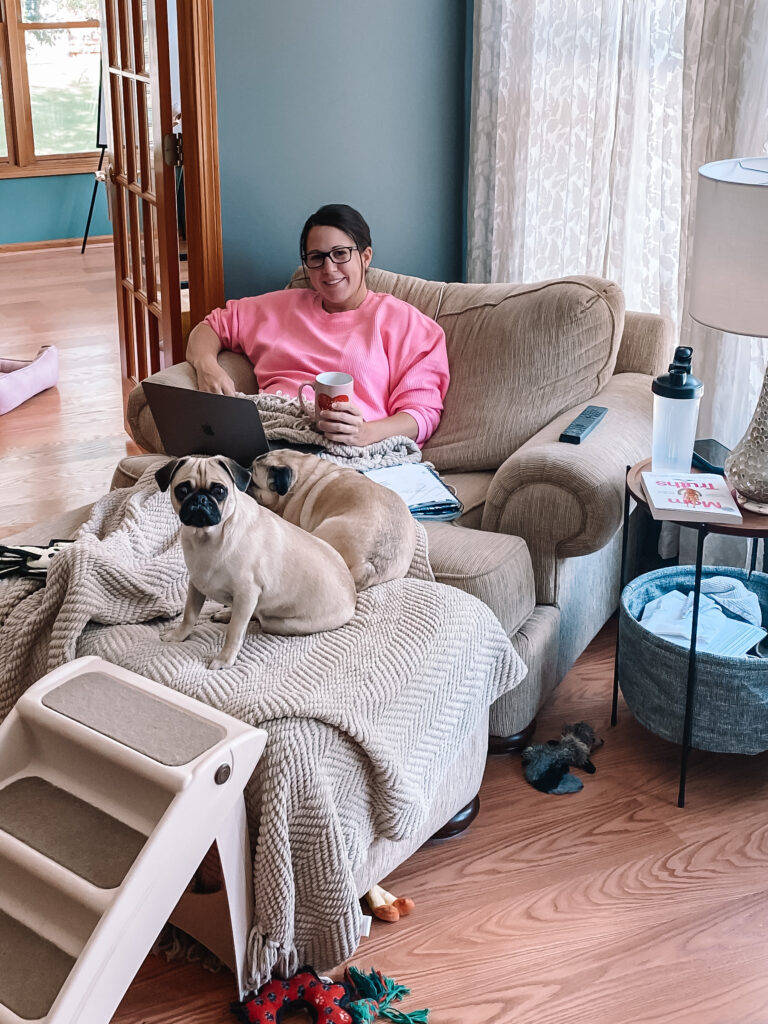
If you read this far! I hope I was of some help. I’ve really had nothing else to do in quarantine but research and prep for our little man!

xo

Pregnant & Quarantined!

In January, my husband and I were blessed with the news of our to be baby boy or girl!

We were getting ready to head home after a week of snowboarding in the back country of northern Japan. the day we found out I was pregnant, the news of Corona Virus began to spread. We wore masks on our entire trip home, and as you know, it was pretty much like wildfire after that!

I must say, overall being pregnant and quarantined has been a BLESSING.

If you know me, you know I am not one to say no to a social gathering, so having no FOMO is a real treat. That being said, we also all have to remember how badly this has effected millions of families in the most devastating ways. As cities across the US begin to reopen and lift restrictions, we are all torn in how to feel about this. Half of your friends/peers Are probably saying how stupid this is, and the other half are saying how they can’t believe it took so long. Well, if you’re pregnant, you get to worry about a whole new slew of controversial opinions! Do you go to that family party, birthday party, wedding shower, etc? Do you plan an in person baby shower? You already know the opinions of friends & family are split. “you have plenty of time” “this should be cleared up by then” “definitely don’t risk it”. Well, if you wait too long, it may be cleared up, then how comfortable will you feel stopping your guests from hugging you, or standing too close if you’re still choosing to be safe? They may not have thought about the virus for weeks at that point, and you’d hate to make them feel badly. Do you have it earlier? Then you will hear how you again “have plenty of time” “will miss out on the joy of a shower” which some may be valid points. My point is that there is no right or wrong option for many choices you make while pregnant, ESPECIALLY when in a situation that not one person you know has lived through UNLESS they were pregnant at the age of 3 and lived through the Spanish Flu. 90% of your friends & family will not even think twice about whatever decision you choose, but some will, and you just have to do what makes you feel most comfortable regardless of what anyone else thinks. If you’re as lucky as I am, your family and friends will support whatever decision you choose and months from now, none of this will matter and your little one will be safe and healthy in your arms! And if you're family or friends are not supportive, you're quarantined, so you can just avoid them anyways 🙂